How to Deploy Azure Webapp With Azure DevOps
Posted on January 28, 2022
This article will explain how to automate .net web application deployment into azure appservice with azure DevOps using ARM templates
Hey, What's up, Welcome back to another very exiting tutorial by Ciemasen. Today we are going to be take a look at How to deploy azure webapp using azure devops. Hope you enjoyed the previous article on How to Enable Azure Free Subscription. If you missed the previous article, we suggest you to have a look on that first.
Overview
In our previous article we have explained how to configure azure continuous deployment. If you missed it have a look on How to configure Azure DevOps CICD article.
Azure app service ARM template
As mentioned earlier we will be deploying .net web application to azure using azure devops pipelines. So before deploying we need to create the app service in azure first. In order to create new azure app service we can log in to the azure portal and create web app as explained in our previous article on How to create Azure Web App. Since we already explained how to create app service in azure portal, in this article we will be using azure ARM template to automate app service creation.
Lets create following azure resource as part of the ARM template- Azure app service plan
- Azure web site
Create azure app service plan in ARM template
{
  "type": "Microsoft.Web/serverfarms",
  "apiVersion": "2020-06-01",
  "name": "[variables('appServicePlanName')]",
  "location": "[parameters('location')]",
  "sku": {
	"name": "[parameters('sku')]"
  }
}
Create azure website in ARM template
{
  "type": "Microsoft.Web/sites",
  "apiVersion": "2020-06-01",
  "name": "[parameters('webAppName')]",
  "location": "[parameters('location')]",
  "dependsOn": [
	"[resourceId('Microsoft.Web/serverfarms', variables('appServicePlanName'))]"
  ],
  "properties": {
	"serverFarmId": "[resourceId('Microsoft.Web/serverfarms', variables('appServicePlanName'))]"
  }
}
{
  "$schema": "https://schema.management.azure.com/schemas/2019-04-01/deploymentTemplate.json#",
  "contentVersion": "1.0.0.0",
  "parameters": {
    "webAppName": {
      "type": "string",
      "defaultValue": "[concat('webApp-', uniqueString(resourceGroup().id))]",
      "minLength": 2,
      "metadata": {
        "description": "Web app name."
      }
    },
    "location": {
      "type": "string",
      "defaultValue": "[resourceGroup().location]",
      "metadata": {
        "description": "Location for all resources."
      }
    },
    "sku": {
      "type": "string",
      "defaultValue": "F1",
      "metadata": {
        "description": "The SKU of App Service Plan."
      }
    }
  },
  "variables": {
    "appServicePlanName": "[concat('AppServicePlan-', parameters('webAppName'))]"
  },
  "resources": [
    {
      "type": "Microsoft.Web/serverfarms",
      "apiVersion": "2020-06-01",
      "name": "[variables('appServicePlanName')]",
      "location": "[parameters('location')]",
      "sku": {
        "name": "[parameters('sku')]"
      }
    },
    {
      "type": "Microsoft.Web/sites",
      "apiVersion": "2020-06-01",
      "name": "[parameters('webAppName')]",
      "location": "[parameters('location')]",
      "dependsOn": [
        "[resourceId('Microsoft.Web/serverfarms', variables('appServicePlanName'))]"
      ],
      "properties": {
        "serverFarmId": "[resourceId('Microsoft.Web/serverfarms', variables('appServicePlanName'))]"
      }
    }
  ]
}
You need to store the ARM template as part of the repository.
Upload ARM template as azure devops build artifact
- task: PublishBuildArtifacts@1
  displayName: 'Publish ARM: drop'
  inputs:
    PathtoPublish: $(System.DefaultWorkingDirectory)/Templates
    ArtifactName: drop
Integrate Azure DevOps with Azure
Configure azure devops service connection
- Select Project settings > Service connections.
-
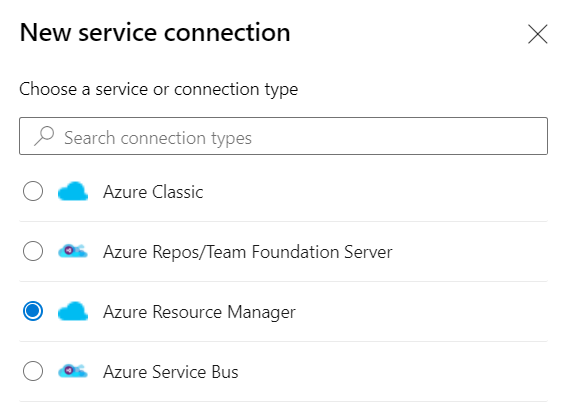
Select + New service connection, select the
Azure Resource Manager, and then select
Next.
-
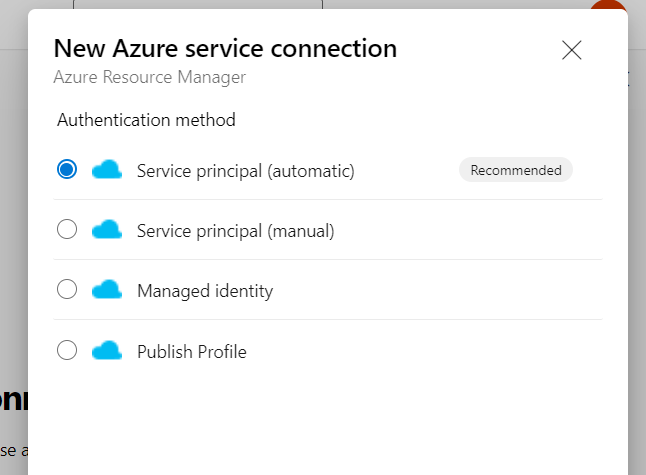
Select the Authentication method, it is recommend to go
with Service principal (automatic), and then select
Next.
-
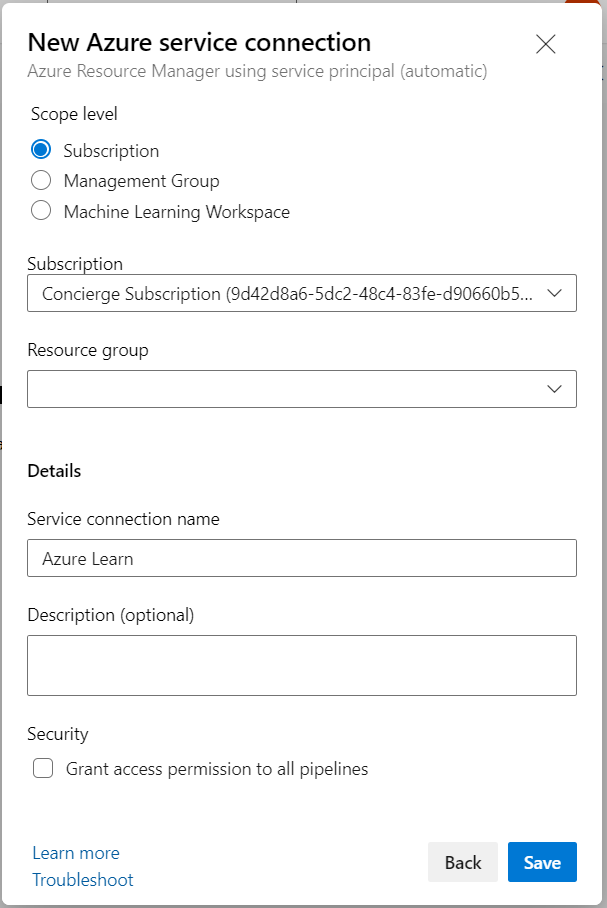
Select the Scope as Subscription. And then select the
subscription you want. Give a name for the service connection and then
Save.
Deploy azure web app using azure devops
Configure azure devops release pipeline to deploy azure web app
-
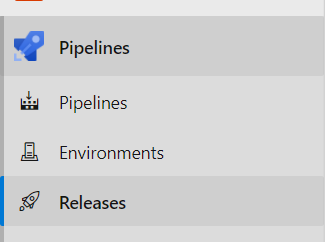
Navigate to the release pipeline
- Select New Pipeline
-
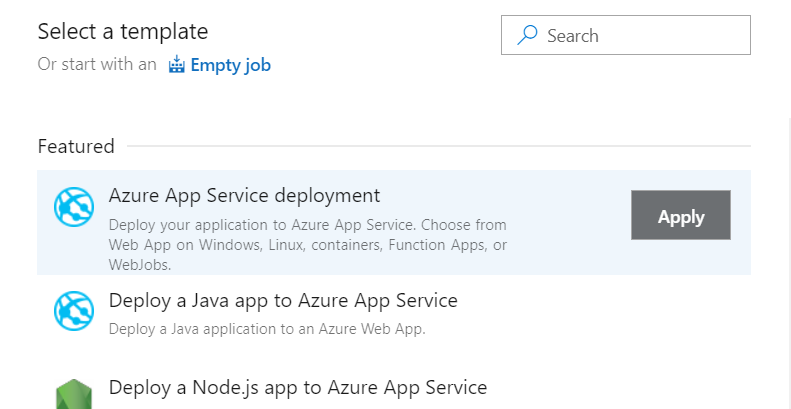
Select Empty Job. You can go with
Azure App Service deployment as well but in this
article we will go with empty job since we need to automate the resource
creation part as well.
-
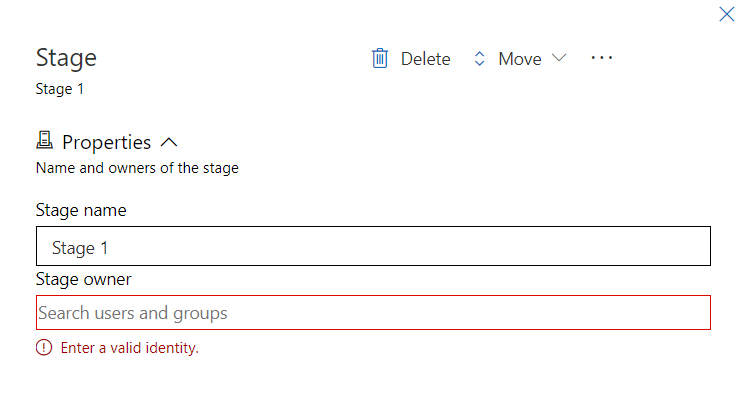
Provide a name for the stage and the owner of the stage.
ARM template deployment
- Add a task in agent jobs section
-
Select ARM template deployment task

-
Now you can select the service connection we created in previous step as
the Azure Resource Manager connection

- Select subscription, resource group and location accordingly
- Select action as Create or update resource group
- Keep Template location as Linked artifact
- Select the path to ARM template from build artifacts
- Set respective parameters in Override template parameters section. These parameters we defined in ARM template already. Here we setting the values for those parameters.
Web app deployment
- Add a task in agent jobs section
-
Select Azure App Service deploy task

-
Select the subscription which we selected for ARM template deployment
task as well.
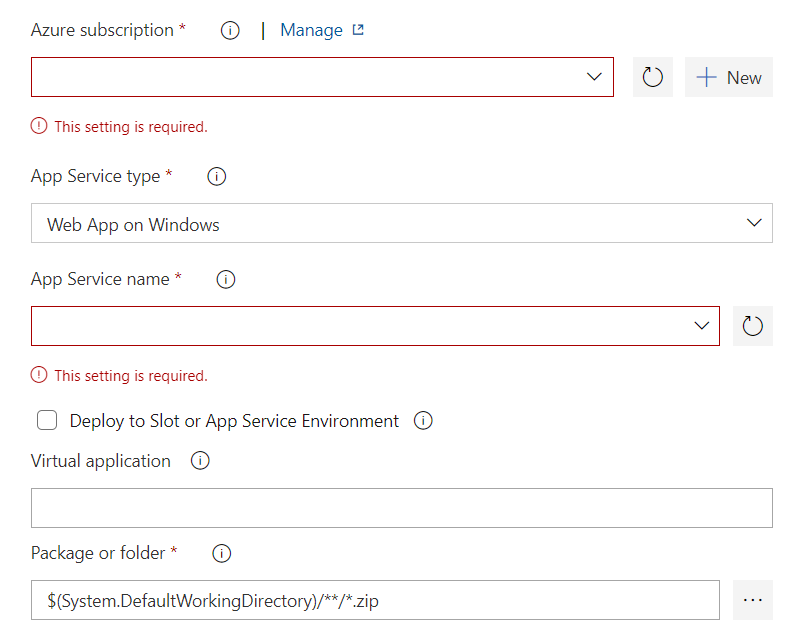
- Provide a name for app service which we set in ARM template deployment task as well. This is the name we used to create the web app in ARM template.
- Select the deployment package from build artifacts.
Now we have the .net web application deployed into azure web app.
Hope you enjoy the tutorial and see you soon in another very exiting tutorial